Ready to tap into the Base chain’s lightning-fast speeds and low fees? You’re in the right place. If you’ve been stuck paying high gas on Ethereum or just want to explore the new frontier of Coinbase’s Layer-2, bridging your ETH to Base is the move. Let’s break down exactly how you can do it, step by step, with zero jargon and all the actionable details you need.
Why Bridge Ethereum to Base?
Base is Coinbase’s Layer-2 network built on Optimism tech, designed for speed, scalability, and access to a growing DeFi ecosystem. By bridging your ETH (or ERC-20 tokens) from Ethereum mainnet to Base, you unlock:
- Lower transaction fees - perfect for active traders or NFT degens
- Faster transaction times - no more waiting ages for confirmations
- Access to exclusive Base-native apps and memecoins
- The same security as Ethereum, since it inherits L1 security guarantees
If you’re new to bridging or just want a foolproof walkthrough, keep reading. I’ll show you how to bridge safely and efficiently using both official and third-party tools.
Step 1: Prepare Your Wallet for the Base Network
You’ll need a wallet like MetaMask that supports custom networks. If you haven’t already added Base Mainnet, here’s how:
- Manual method:
- Network Name:
Base Mainnet - New RPC URL:
https://mainnet.base.org - Chain ID:
8453 - Currency Symbol:
ETH - Block Explorer URL: https://basescan.org
- The easy way:
- Head over to Chainlist (chainlist. org) and search for “Base” – then add it directly with one click.
This step ensures your wallet can actually see (and interact with) assets once they arrive on Base.
Your Options: Official vs. Third-Party Bridges
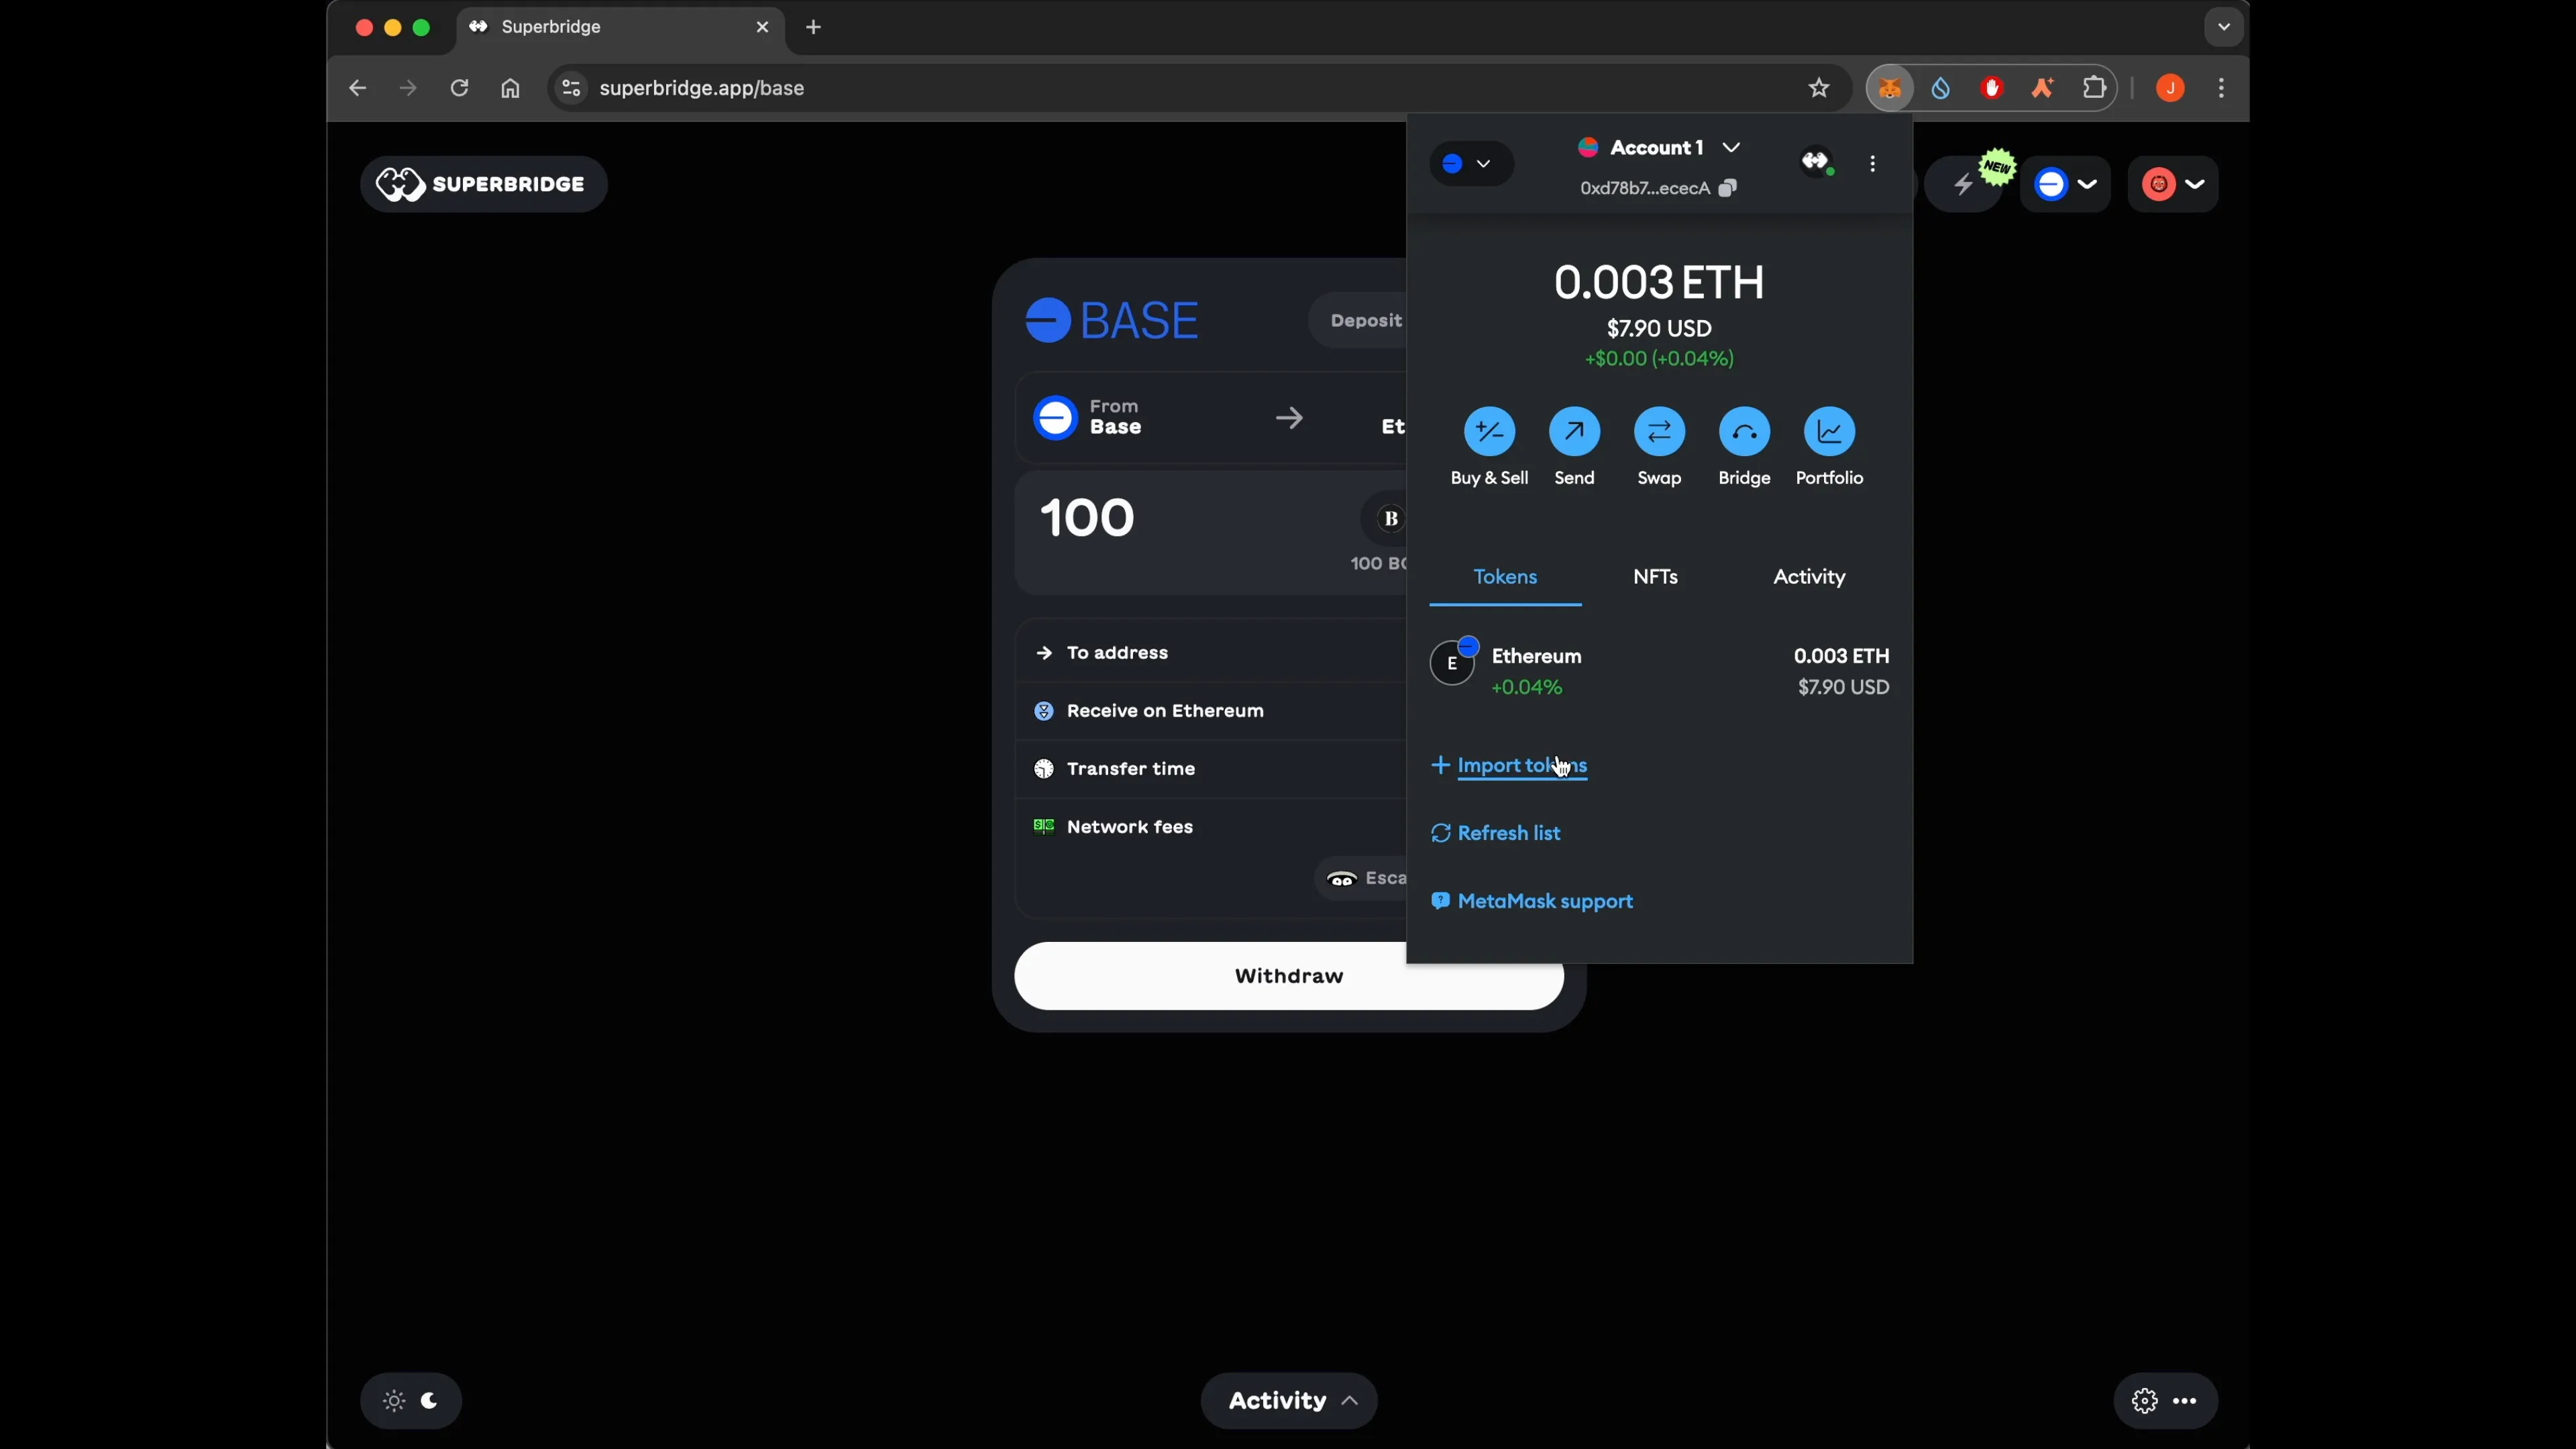
The most popular way is using the official bridge at bridge. base. org, but there are also fast third-party options if you want even quicker transfers or lower fees.
- The Official Base Bridge: Reliable, simple UI, directly supported by Coinbase/Base devs. Transfers typically complete in 1-3 minutes when going from Ethereum to Base. Heads up: going back (Base → Ethereum) takes around seven days due to withdrawal security periods.
- Orbiter Finance: Third-party bridge known for rapid transfers (often under a minute), ideal if you’re impatient or hunting arbitrage opportunities across chains.
- deBridge: Cross-chain protocol supporting multiple networks and often completing transfers in seconds, great if you want flexibility beyond just ETH.
Tags
Related Articles

How to Bridge USDC from Arbitrum to Base Chain Without Gas Fee Surprises
Bridging USDC from Arbitrum to Base can feel like navigating a minefield of unexpected gas fees, especially when bridges secretly route through Ethereum's Layer 1. I've seen portfolios bleed value from these hidden costs, turning a simple...
Apr 22, 2026
How to Bridge USDC to Base Chain Using Official Bridge Without Gas Fee Surprises 2026
In the fast-evolving world of DeFi, transferring USDC to the Base chain remains a cornerstone move for traders and builders seeking low-cost execution on this Ethereum Layer 2 powerhouse. But nothing kills momentum like gas fee surprises...
Feb 6, 2026
How to Bridge Solana Tokens to Base Chain via Aerodrome: 2026 Step-by-Step
Hey, Base Radar squad! SOL's chilling at $123.09 after dipping 2.90% over the last 24 hours, with a high of $126.77 and low of $117.55. But here's the real momentum play: bridging your Solana tokens to Base via Aerodrome in 2026. Forget...
Jan 26, 2026
How to Bridge Ethereum to Base Chain: Step-by-Step Guide for 2025
Bridging Ethereum to Base chain is a transformative move for users looking to tap into faster, lower-cost transactions without sacrificing the security of Ethereum’s mainnet. As of November 25,2025, Ethereum (ETH) is trading at $2,927.09 ,...
Nov 25, 2025
No comments yet. Be the first to share your thoughts!