
Bridging assets between Ethereum and Base used to be a technical headache, but the landscape has changed dramatically with Velora’s streamlined crosschain solution. As of October 2025, you can move tokens from Ethereum to Base faster, more securely, and without the usual friction of multi-step bridging. This guide provides an up-to-date, visual walkthrough for anyone looking to execute their first Ethereum to Base transfer using Velora’s intent-based platform.
Why Bridge to Base Using Velora?
The Base chain is rapidly becoming a hub for DeFi innovation and low-fee trading strategies. However, moving assets onto Base can seem daunting if you’re used to legacy bridges or manual swaps. Velora addresses this by offering:
- Seamless asset transfers: No need to juggle multiple apps or bridge contracts.
- No custody risk: You retain control of your assets throughout the process.
- Gasless transactions: Network fees are deducted from your received tokens - no need for native tokens upfront.
- Unified execution and MEV protection: Optimized routes reduce slippage and latency.
Step-by-Step Guide: Move Assets from Ethereum to Base
This tutorial leverages live market context and the latest security improvements in crosschain swaps. Before starting, ensure you have a compatible wallet (like MetaMask) with enough ETH for fees, even though Velora’s gasless model means these are ultimately deducted from your transferred amount.
Bridge ETH from Ethereum to Base Using Velora: A Visual Step-by-Step Guide
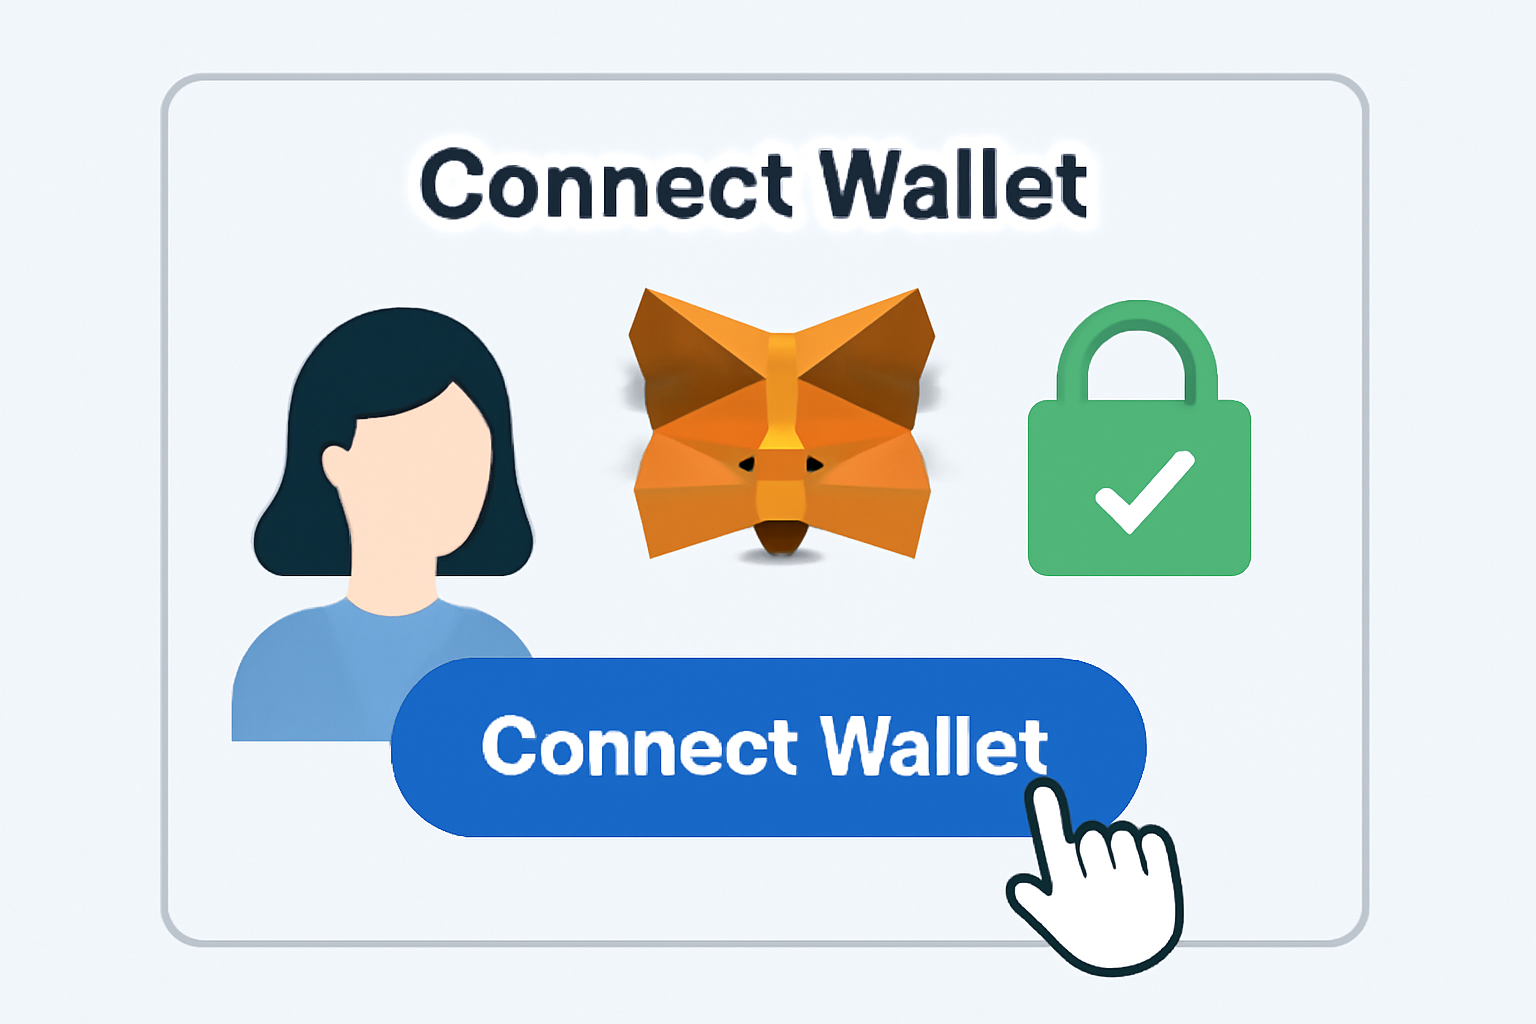
Step 1: Connect Your Wallet
- Go to app.velora.xyz.
- Click “Connect Wallet” and select your preferred wallet (e. g. , MetaMask). Follow the prompts until your address is connected at the top right corner.
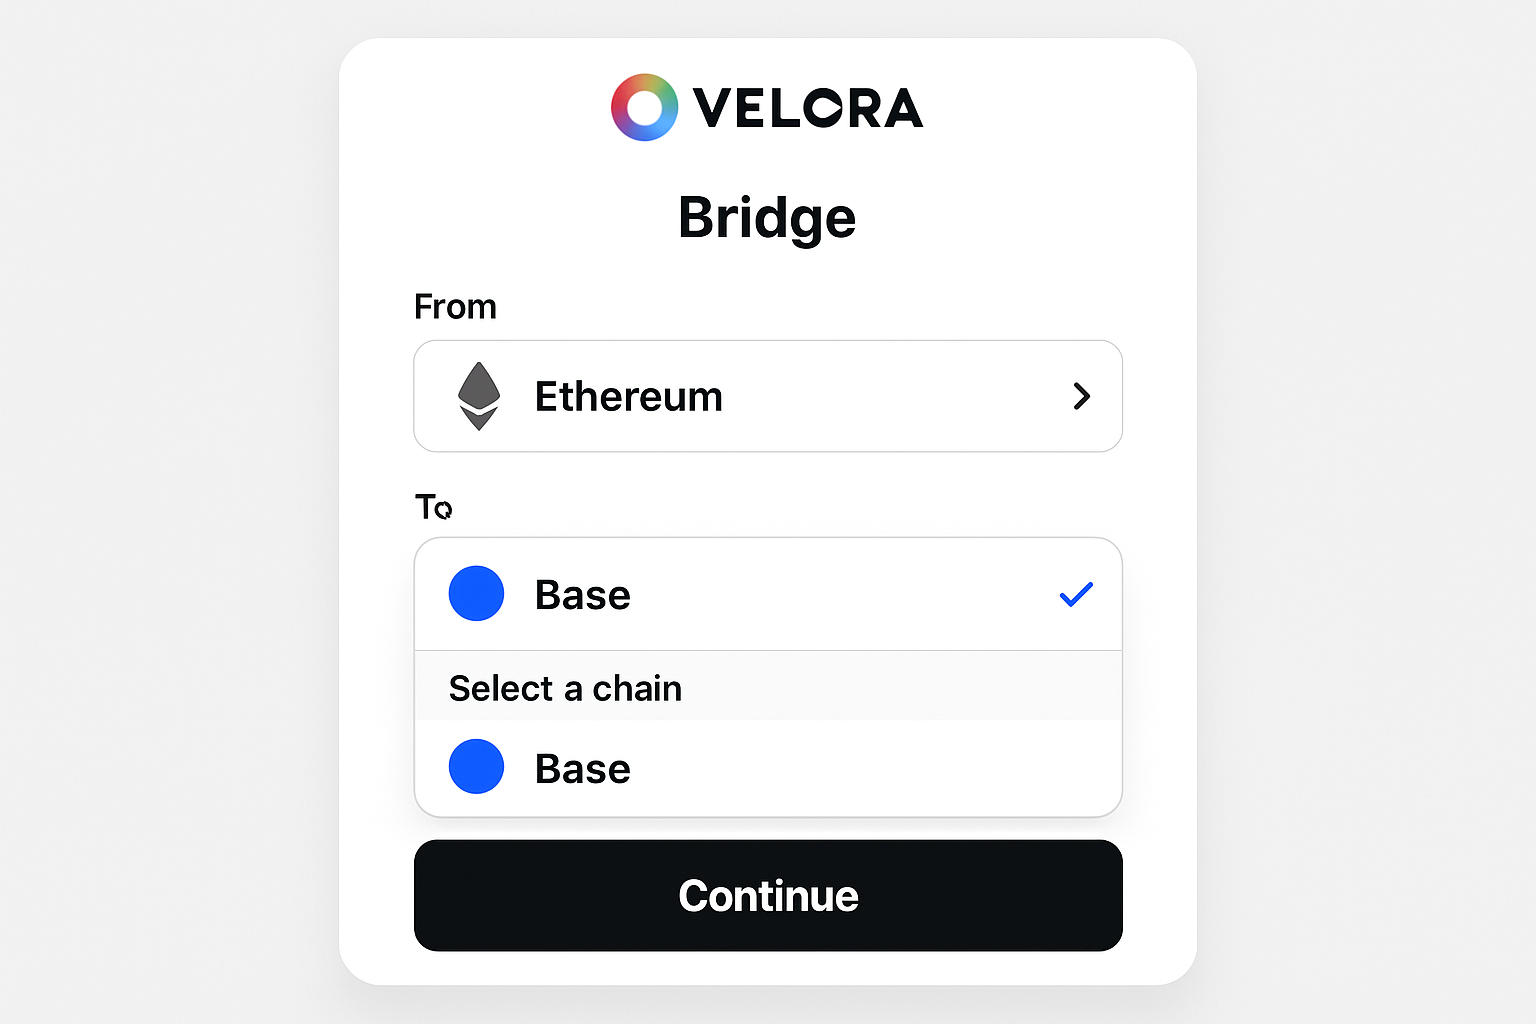
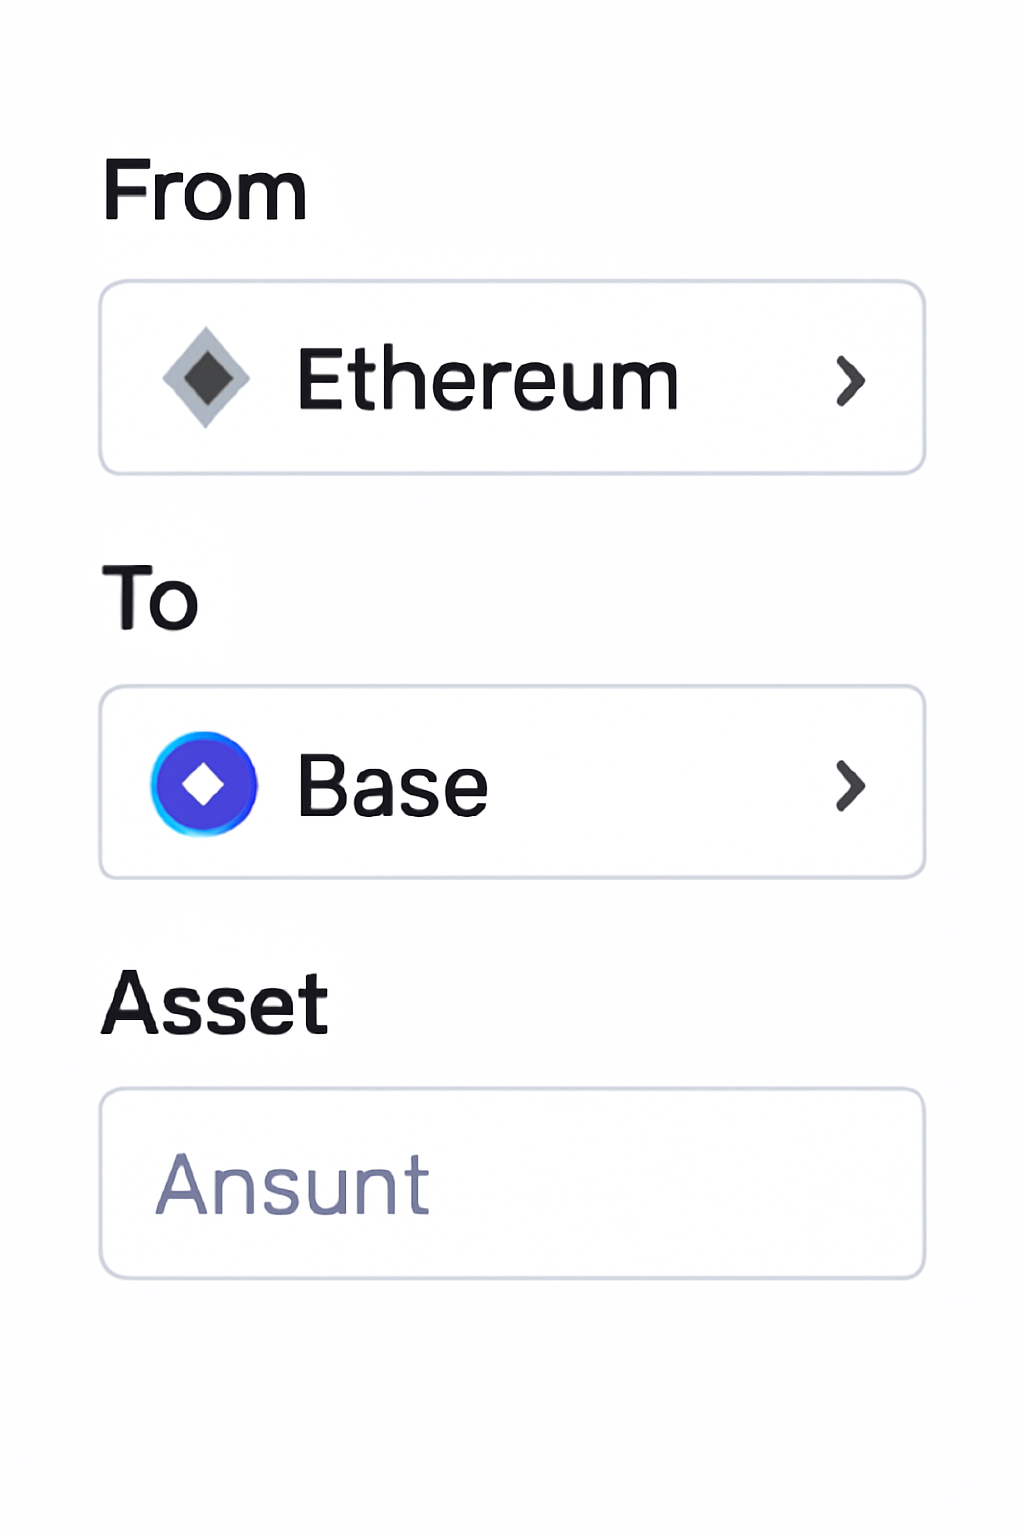
Step 2: Configure Your Transfer
- Select Ethereum as your source chain.
- Select the asset you want to send (e. g. , USDC or ETH) and enter the amount.
- Select Base as your destination chain.
- If needed, choose which asset you want to receive on Base (Velora supports swaps during bridging).
This configuration stage is where Velora shines compared to other bridges. The interface will automatically suggest optimal routes based on current liquidity, minimizing costs while maximizing speed. For more detail on making your first swap, see their official guide: How to Make Your First Crosschain Swap on Velora.
The Mechanics Behind Gasless Bridging
A standout feature of bridging via Velora is its gasless transaction design. Unlike traditional bridges that require native tokens (like ETH) on both chains just to pay fees, Velora deducts all necessary fees directly from what you receive on the destination chain. This is especially useful if you’re new to Base or don’t already hold its native assets.
The entire process is protected by OP Stack security - giving you peace of mind as you move funds between ecosystems. As always, double-check network details before confirming any transaction, but rest assured that custody risk is minimized thanks to trustless execution layers now embedded in platforms like Velora.
What to Expect During Your Ethereum to Base Transfer
Once you hit “Confirm Trade” in Velora, the platform’s unified execution layer takes over. This means you don’t have to manually monitor bridge contracts or interact with multiple dApps. Instead, Velora manages the swap, deposit, and delivery across chains for you. The real-time order tracking feature lets you follow each step, from asset swap on Ethereum to final settlement on Base, directly within the Velora interface.
Typical transfer times are now measured in minutes rather than hours, depending on network congestion and asset type. You’ll receive a notification when your assets arrive in your Base wallet. There’s no need to add custom tokens or adjust wallet settings, the process is designed for both beginners and experienced DeFi users.
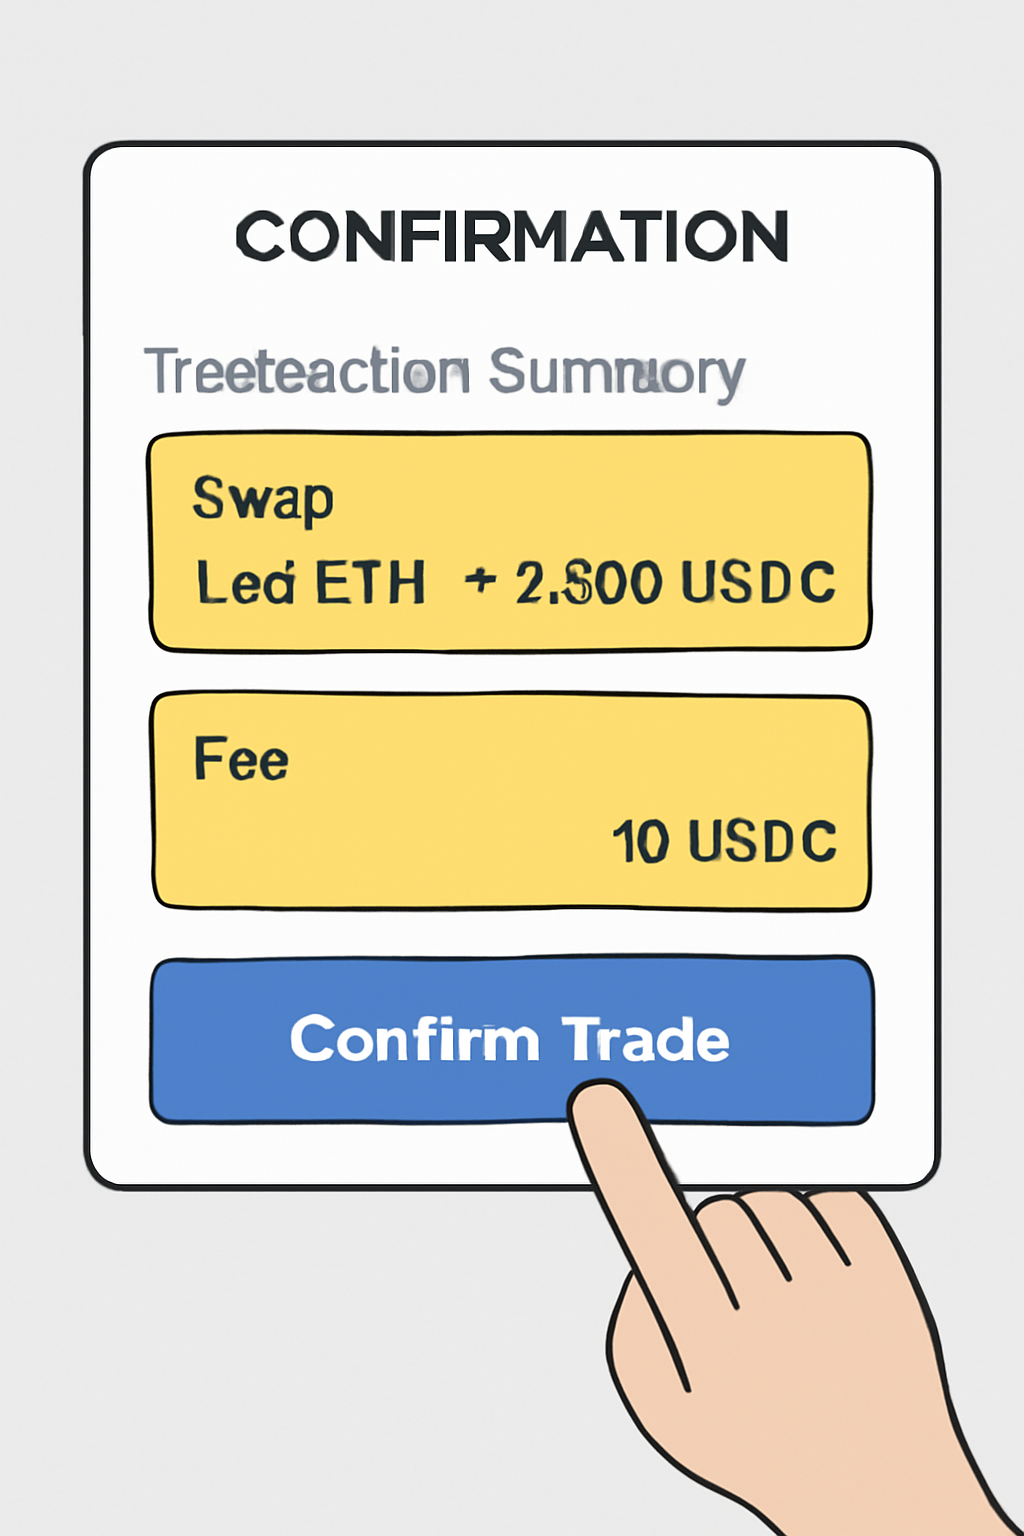
Step 3: Review and Confirm
- Velora displays an optimized route for your transaction, including slippage estimates and MEV protection status.
- You’ll see a summary of all fees, network fees (deducted from received amount), swap fees, and the net amount expected in your Base wallet.
- Approve the transaction in your connected wallet. This is your last chance to verify all details before execution.
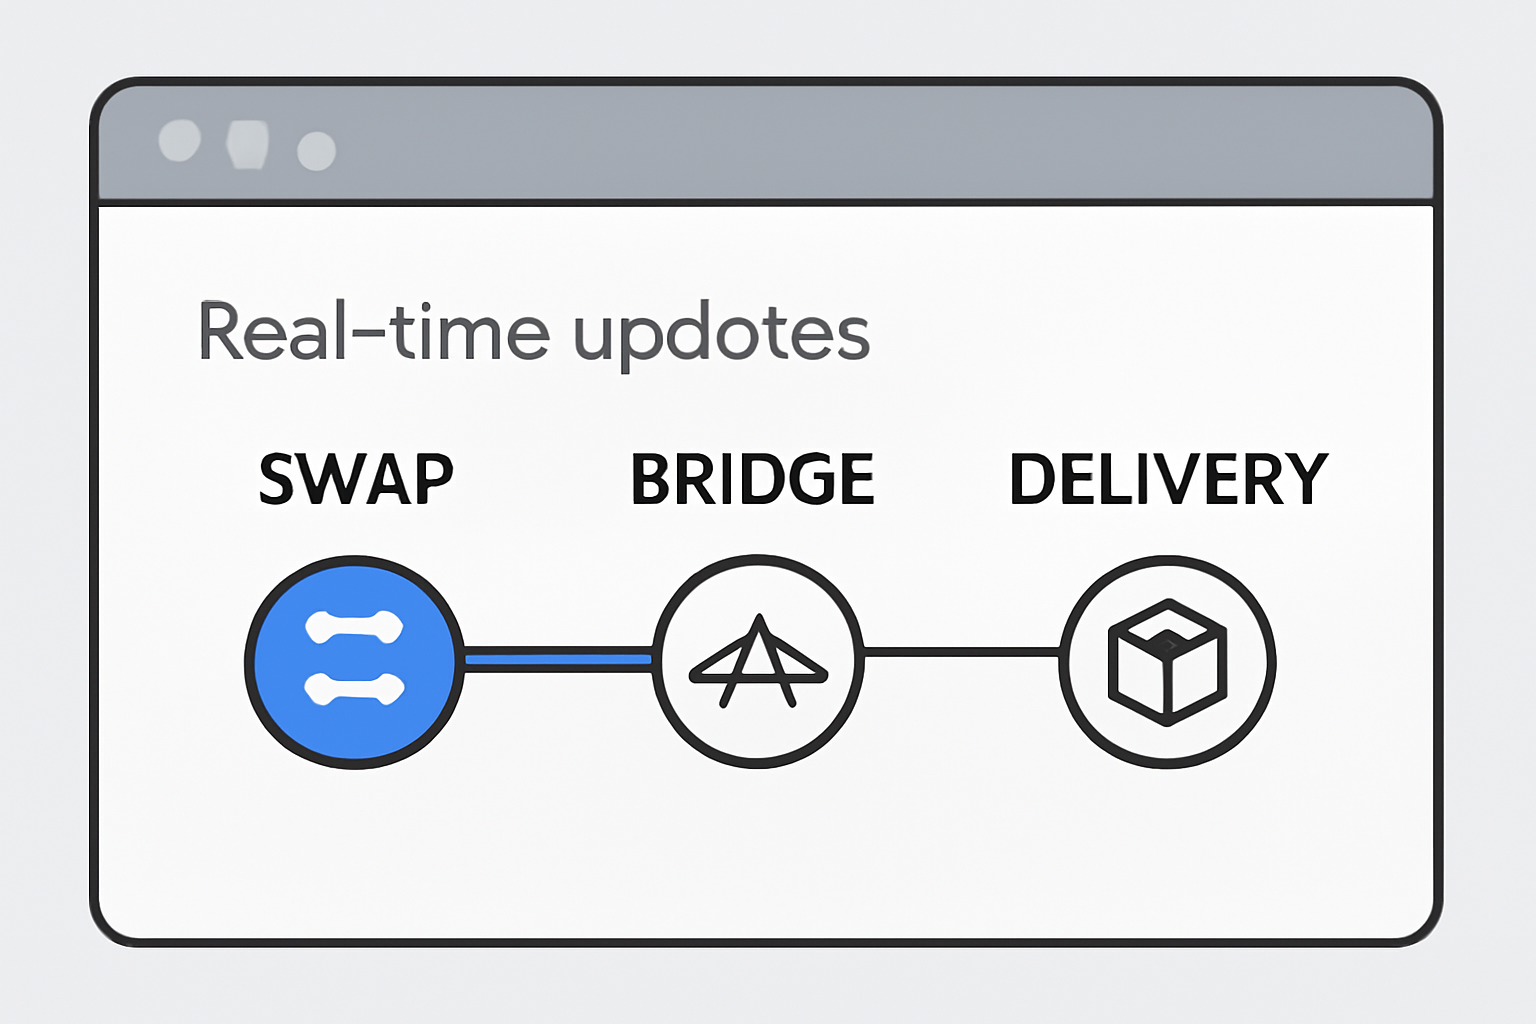
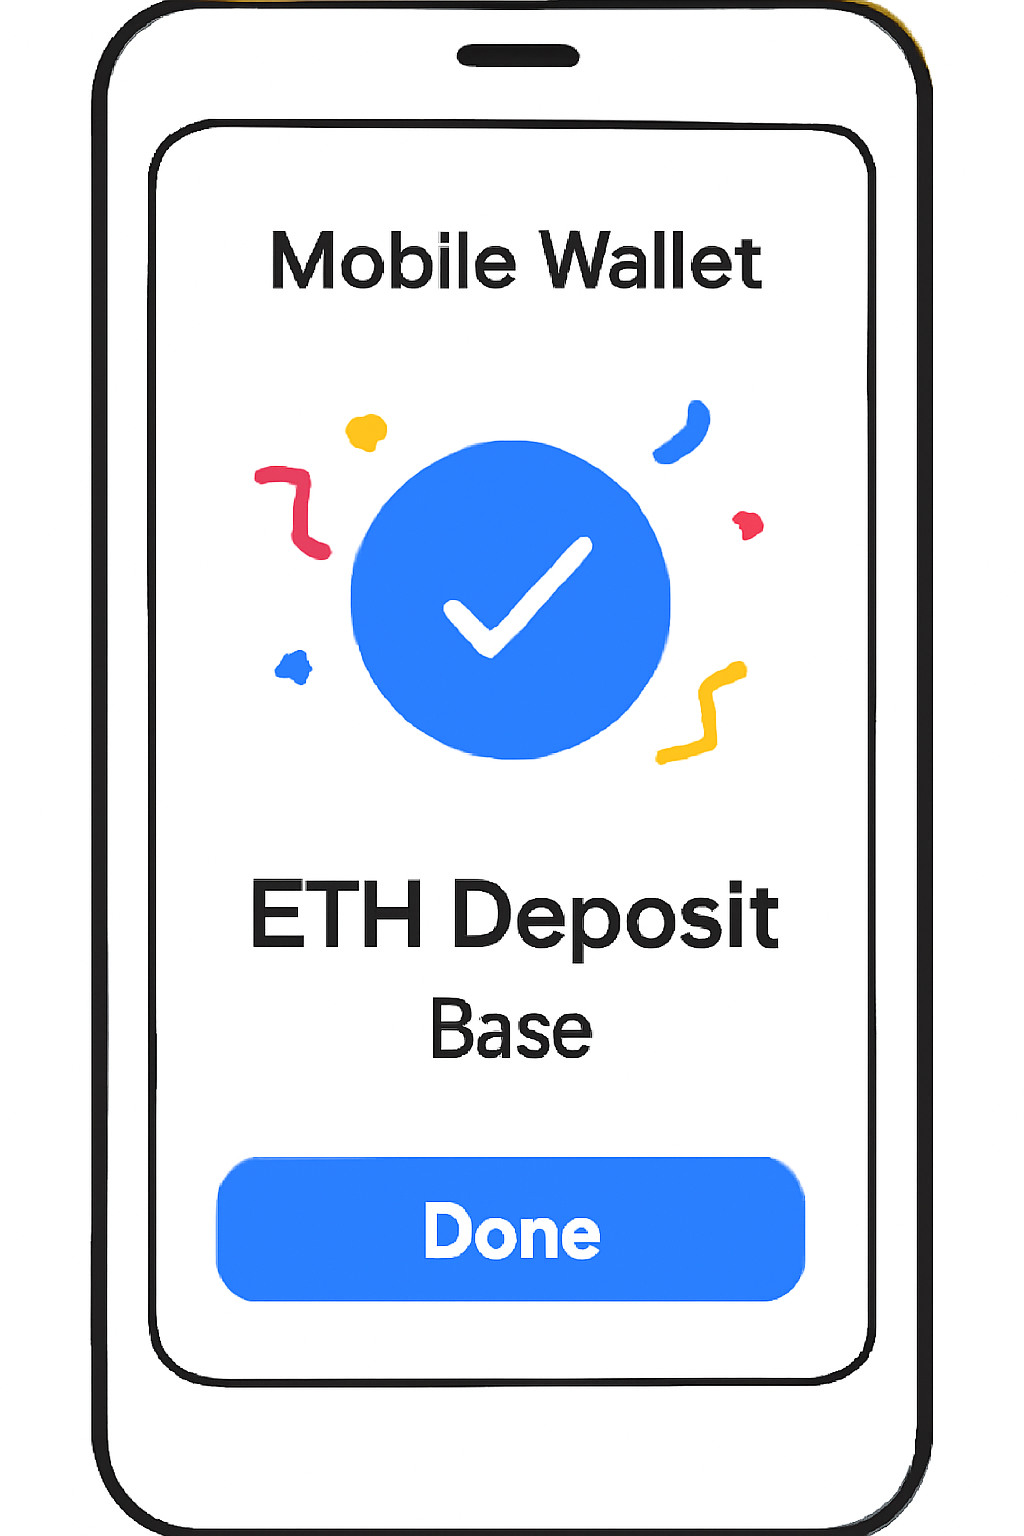
Step 4: Track and Finalize
- Click “View Order Details” inside Velora to watch real-time progress as your assets move crosschain.
- No manual intervention is needed, the process is automated from swap initiation to asset delivery on Base.
- Your funds will appear in your Base wallet once finalized; check your balance directly or via any compatible explorer.
If you’re migrating tokens already held within Velora, leverage their official migration tutorial for a smooth transition: Velora Token Migration Tutorial.
Tips for Crosschain Success: Security and Strategy
Security remains paramount when bridging assets between chains. Always double-check that you’re using the official Velora app (app.velora.xyz) and never share private keys or seed phrases. Thanks to OP Stack security and trustless execution, custody risks are minimal, but vigilance is still key in DeFi. Consider using small test amounts if it’s your first time moving significant funds between Ethereum and Base.
Strategically, bridging opens up new opportunities:
- Diversify across ecosystems: Access exclusive DeFi protocols or yield strategies launching first on Base chain.
- Avoid high gas costs: Move liquidity to take advantage of lower fees and faster settlement on Base compared to Ethereum mainnet.
- Simplify portfolio management: Use Velora’s intent-based routing for unified swaps instead of piecemeal bridging plus DEX trading steps.
If you’re pursuing advanced crosschain strategies, like arbitrage or liquidity provision, monitor bridge timing and slippage closely. The current landscape rewards nimble users who can capitalize on fast-moving opportunities between Ethereum and Base.
Key Takeaways: Bridging with Confidence
The days of clunky multi-step bridges are behind us. With platforms like Velora, moving assets from Ethereum to Base is now accessible, secure, and efficient, whether you’re optimizing yield, exploring new memecoins, or deploying capital into cutting-edge DeFi projects. Always start with small amounts if you’re new to bridging protocols, keep up with platform updates via official channels, and enjoy the flexibility that modern crosschain tools provide.


No comments yet. Be the first to share your thoughts!