Bridging assets between Base and Solana is now a practical necessity for traders who want to capitalize on the unique liquidity, speed, and dApp ecosystems of both chains. As cross-chain DeFi matures, the process has become streamlined but still demands careful attention to security and transactional detail. This guide delivers a precise, actionable walkthrough for bridging your tokens from Base to Solana using the latest cross-chain bridge solutions.
Why Bridge From Base to Solana?
Base offers low fees and tight integration with Ethereum tooling, while Solana boasts unmatched throughput and an expanding suite of DeFi protocols. By bridging assets between these networks, you unlock new yield strategies and trading opportunities that are otherwise siloed. For example, USDC liquidity on Solana can be deployed instantly in high-velocity AMMs or NFT markets after originating on Base. However, the process requires using a reputable bridge platform that supports both networks.

The 3-Step Guide: How To Bridge Base to Solana
This guide focuses on the most up-to-date method for bridging assets from Base to Solana. The process is consistent across leading platforms such as Symbiosis, Portal Bridge, and Allbridge. Always ensure you use official URLs to avoid phishing risks.
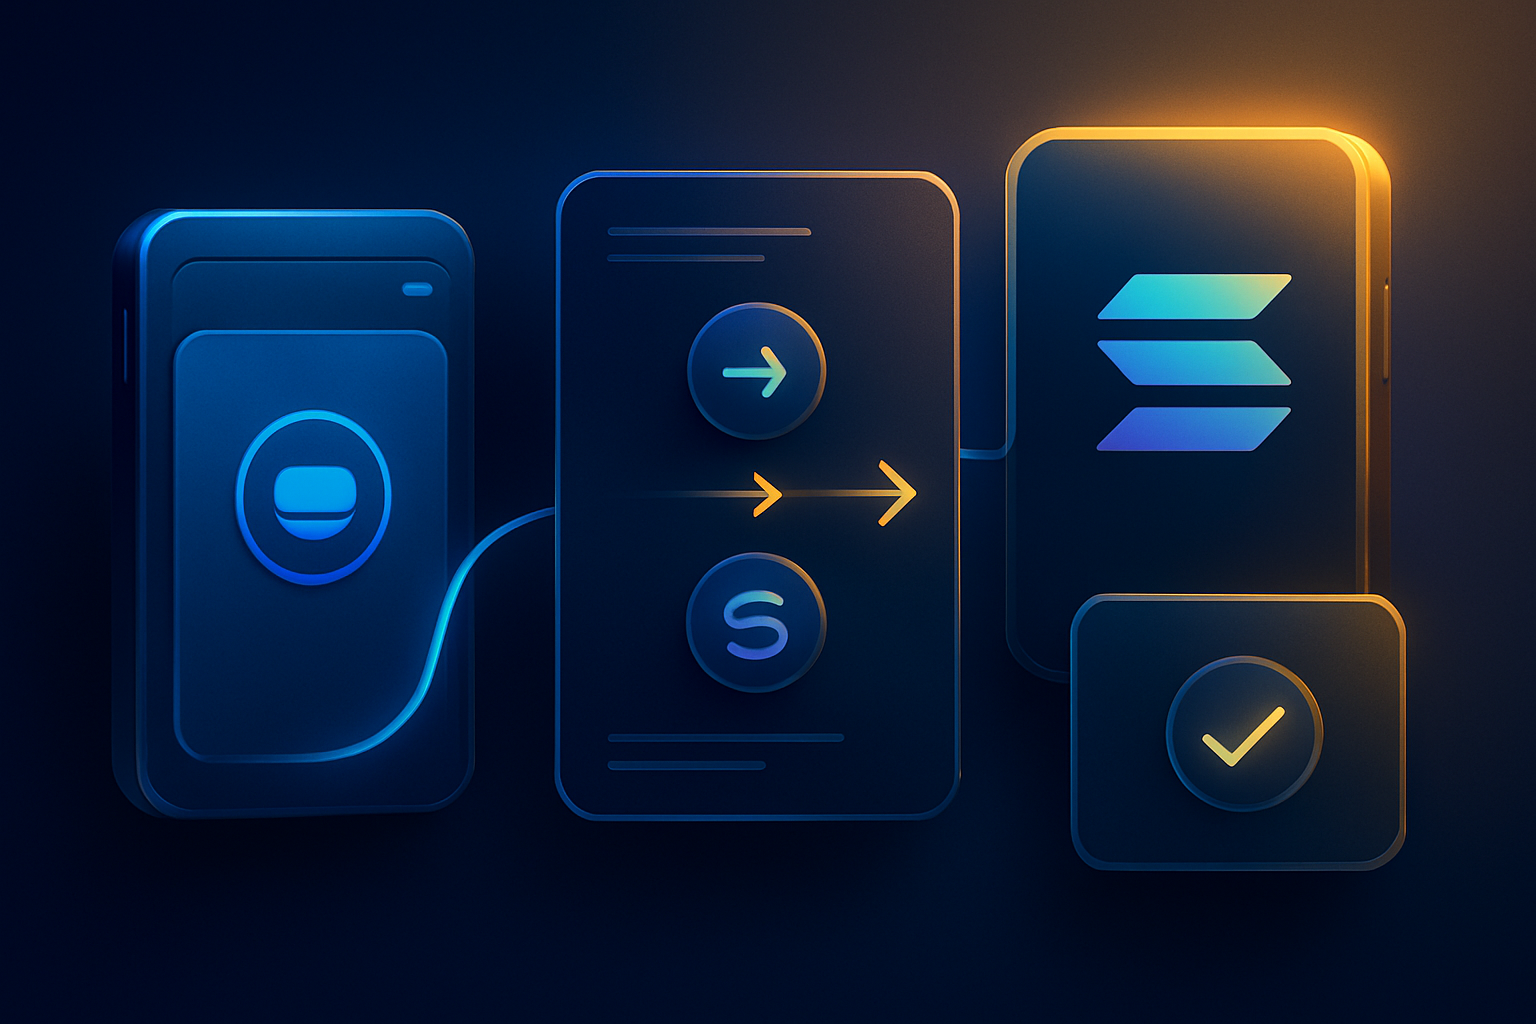
Bridge Assets from Base to Solana: Step-by-Step Visual Guide
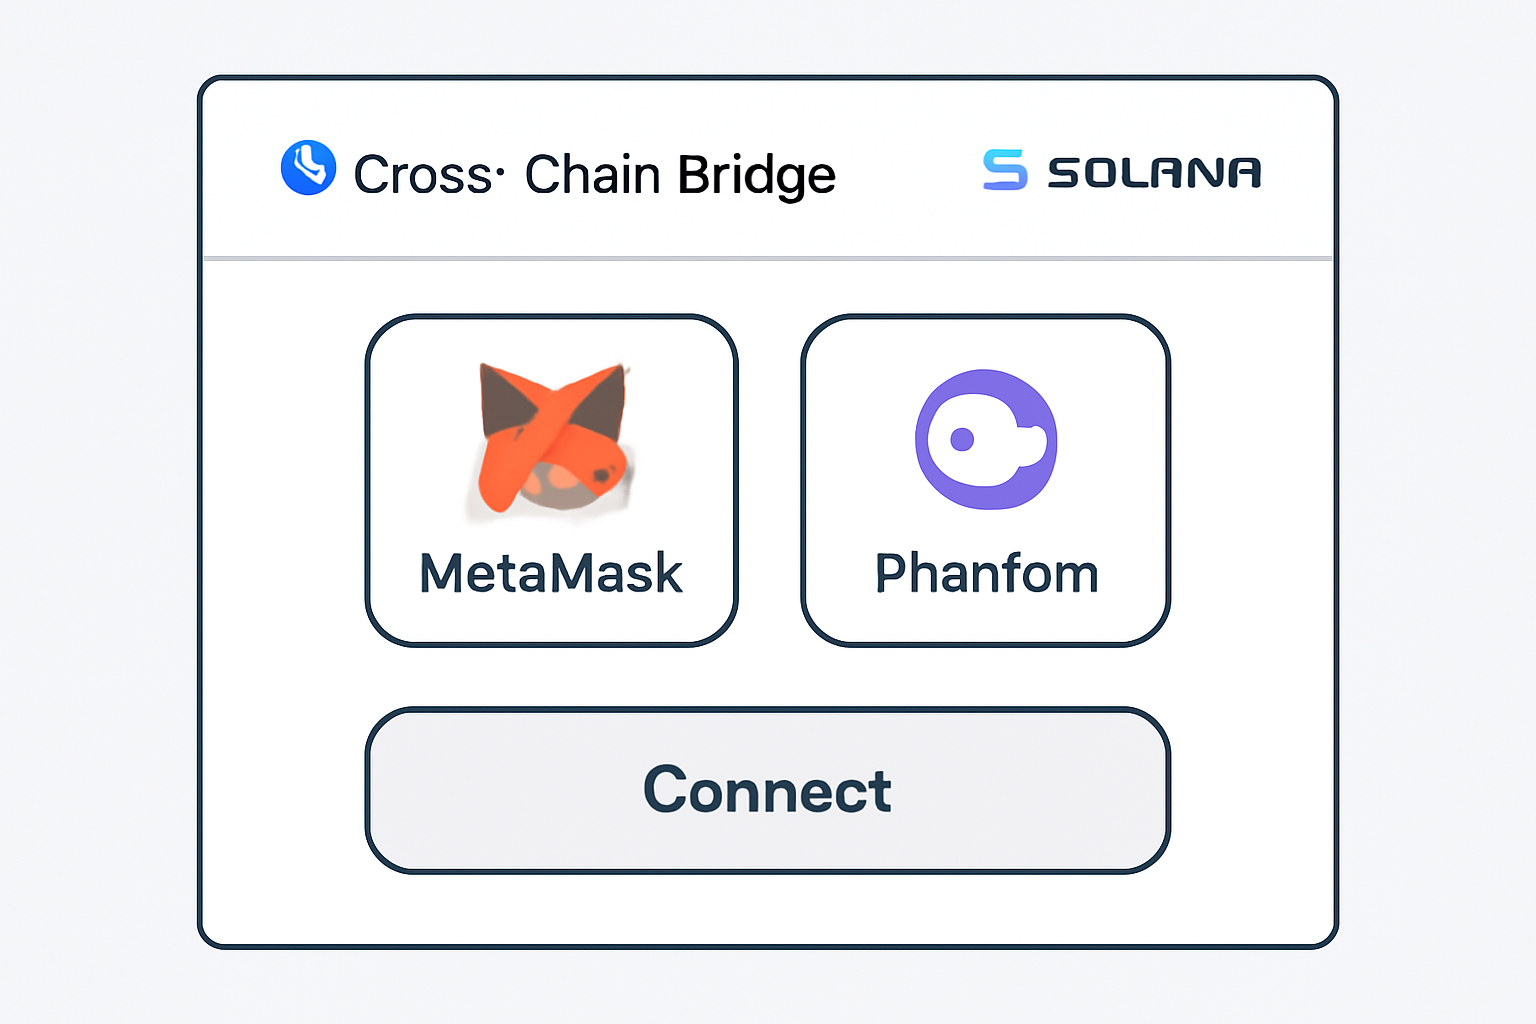
Step 1: Connect Your Wallets to a Supported Cross-Chain Bridge
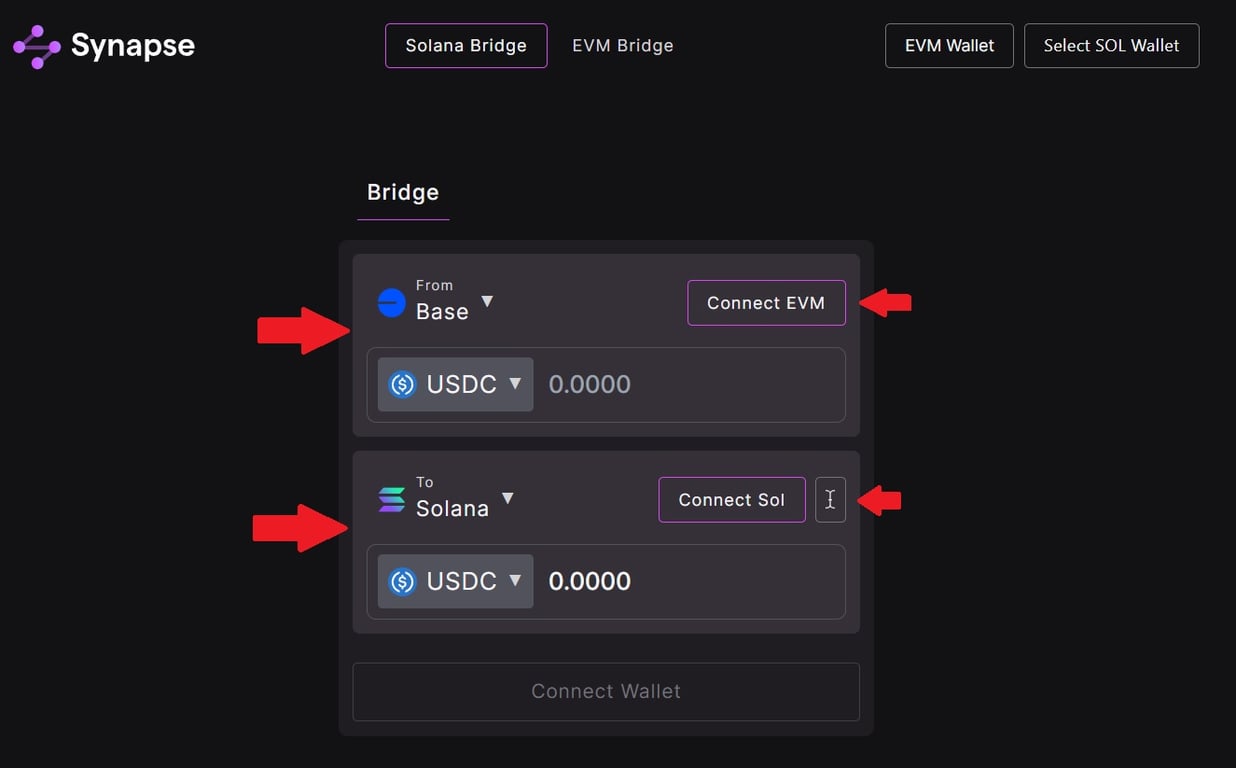
First, select a cross-chain bridge platform that explicitly supports transfers from Base to Solana. Symbiosis is currently among the most user-friendly options (see here). Once there:
- Connect your Base wallet: Use MetaMask or another EVM-compatible wallet holding your assets on Base.
- Connect your Solana wallet: Use Phantom or Solflare for easy integration with the destination chain.
You must connect both wallets in sequence for the platform to recognize your source (Base) and destination (Solana) addresses.
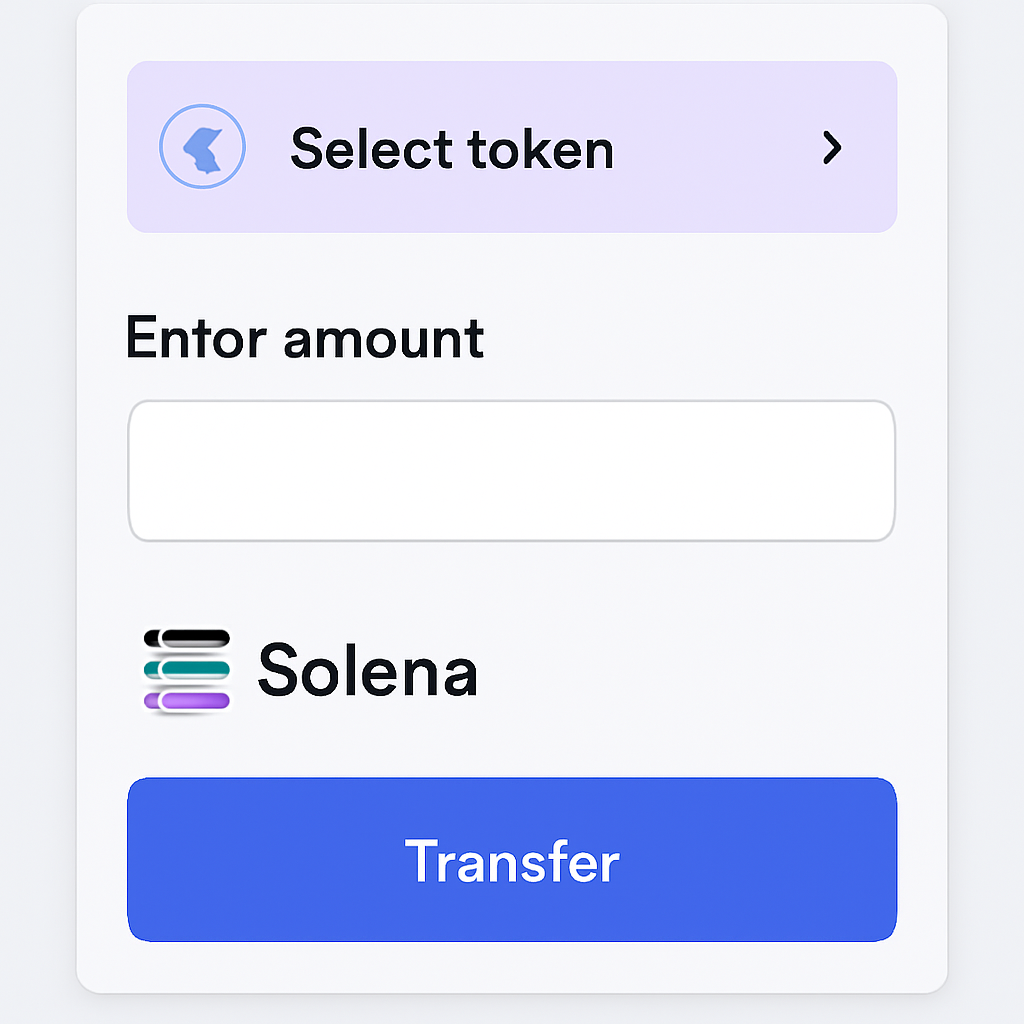
Step 2: Select Asset and Amount, Choose Destination Network, Initiate Transfer
With both wallets connected:
- Select the asset you wish to bridge: Most bridges support USDC as the primary option due to its deep liquidity across chains. Some may also allow other ERC-20 tokens depending on protocol support.
- Enter the amount: Specify how much you want to transfer from your Base balance.
- Select "Solana" as your destination network: This ensures that your bridged tokens arrive in SPL token format compatible with dApps on Solana.
- Follow all on-screen prompts carefully: Review estimated fees and transfer time before proceeding.
This step is critical - double-check token types and recipient addresses before confirming any transaction. Mistakes here can result in lost funds or unsupported token formats arriving in your wallet.
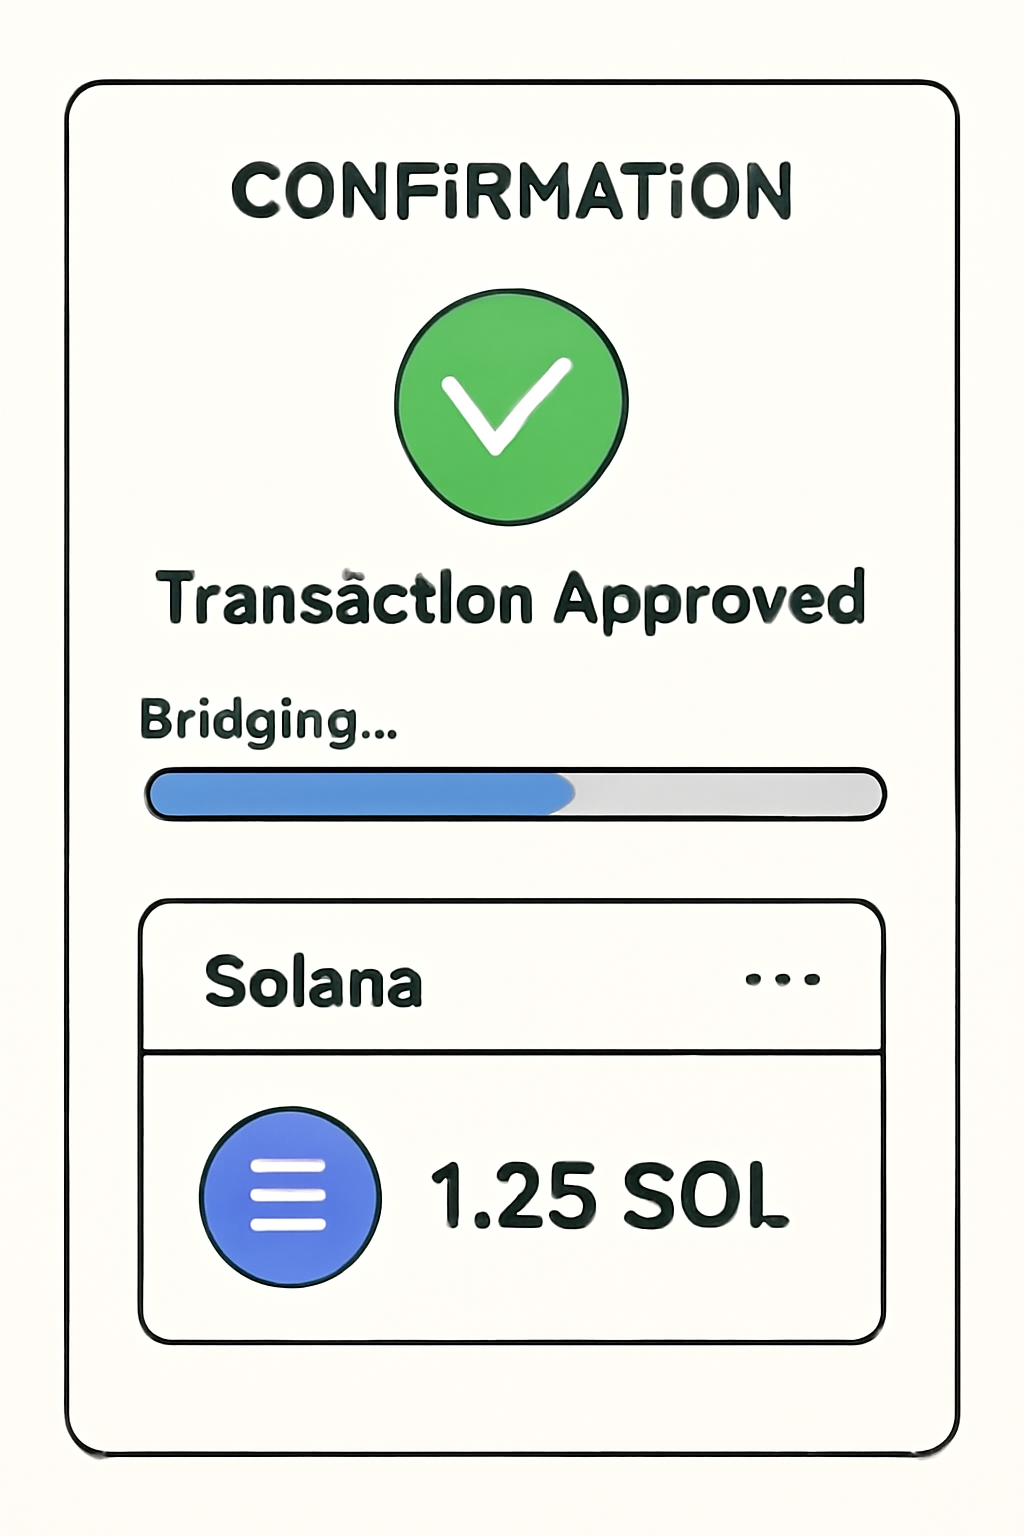
Navigating Transaction Approval and Confirmation
The final stage involves approving transactions in both wallets and monitoring transfer status until completion. We'll cover best practices for this phase - including security checks - in the next section of this guide.
Once you have set the correct parameters and initiated the transfer, the bridge will prompt you to approve the transaction in your Base wallet (such as MetaMask). This step is where most operational errors occur, so verify all transaction details, especially token type, amount, and destination address, before clicking “Approve. ” For some bridges and assets, a secondary approval on the Solana side (via Phantom or Solflare) may be required to finalize receipt.
Step 3: Approve Transaction, Wait for Confirmation, Verify Receipt
- Approve the transaction: In your Base wallet interface, confirm any pop-ups or signature requests. This authorizes the bridge smart contract to move assets from your address.
- Monitor the transfer: The bridge platform will show a progress bar or status update. Transfers can take anywhere from a few seconds to several minutes depending on network congestion and bridge architecture. Do not refresh or disconnect wallets during this phase.
- Check your Solana wallet: Once complete, open your Phantom or Solflare wallet and verify that the bridged asset appears. If you do not see it immediately, try refreshing the wallet interface or manually adding the SPL token address.
3 Essential Steps to Bridge Base to Solana Securely
- Connect both your Base and Solana wallets to a cross-chain bridge platform (e.g., Symbiosis, Portal Bridge, or Allbridge) that supports Base-to-Solana transfers. Ensure you use official links to avoid phishing scams. Compatible wallets include MetaMask for Base and Phantom or Solflare for Solana.
- Select the asset and amount to bridge from Base, choose Solana as the destination network, and initiate the transfer following on-screen prompts. Double-check the token type, recipient address, and estimated fees before proceeding.
- Approve the transaction in your wallet(s), wait for confirmation, and verify that the bridged asset appears in your Solana wallet. Monitor the transaction status on the bridge interface and confirm receipt in your Solana wallet (e.g., Phantom).
Security remains paramount throughout this process. Use only official bridge URLs (such as Symbiosis) and never approve transactions that seem suspicious or request excessive permissions. Be wary of phishing attempts, always double-check browser URLs and consider using browser wallets with built-in phishing protection.
Bridge Fees, Timing and Troubleshooting
Bridging from Base to Solana typically incurs two types of fees: a protocol fee charged by the bridge itself (often 0.05-0.25% depending on volume) and network gas fees on both chains. During high congestion periods on either network, expect longer confirmation times and potentially higher costs. If a transfer fails or is delayed beyond expected timeframes (e. g. , more than 15 minutes), consult the bridge’s support documentation, most platforms provide transaction explorers to track cross-chain status using your transaction hash.
If you encounter persistent issues such as missing funds after apparent completion, contact support directly via official Discords or help desks linked on their site. Never share private keys with anyone claiming to be support staff.
Expanding Your DeFi Toolkit Post-Bridge
After successful bridging, your assets are now accessible within Solana’s ecosystem, ready for use in high-performance AMMs like Orca, lending protocols such as Marginfi, or NFT marketplaces native to Solana. This cross-chain mobility enables advanced strategies such as yield farming across chains or arbitrage between DEXs operating at different speeds and fee structures.
If you’re migrating stablecoins like USDC from Base to Solana for instant deployment into DeFi opportunities, or simply diversifying custody risk, the process above provides both speed and transparency unmatched by centralized exchanges.
The landscape of cross-chain interoperability continues to evolve rapidly. By mastering these steps, and adhering strictly to best practices around security, you’ll position yourself at the forefront of multi-chain DeFi innovation.


No comments yet. Be the first to share your thoughts!